
Gear, tech, and especially online platforms make it possible for me to have a business doing what I love so I wanted to share a list of what I personally use. I’ve tried several hardware and software tools over the years and these are the ones that I recommend.
Please Note: I’m a proud affiliate for some of these tools which means that if you click a link and make a purchase, I earn a commission at no extra cost to you. But I want to emphasize that I personally use everything on this page somewhere in my workflow. These recommendations are based on my experience, not because of the commission I may receive. I signed up as an affiliate for many of these tools because it’s a win-win: you discover an awesome tool and I earn a small commission! (Check out my Ethics page for info about how I work with companies.)
Next to each tool, I’ve included a description, thoughts based on my experience, and if applicable, links to corresponding videos from either me or Tom (my husband and business partner). Even though I believe in all of these services/products, what works for me may not work for you. So make sure to do your research to see if something would really work for you and your workflow!
Here’s a video explaining my full setup.
Equipment / Hardware

Canon EOS 6D Mark II
This is the camera that I use to record my videos and do my livestreams. I actually didn’t buy this camera - it was a hand-me-down from my husband Tom who upgraded to the Canon EOS R. I absolutely love how the Canon 6D looks so I don’t plan to change my camera setup any time soon. But if you’re in the market for a camera now, Tom would definitely recommend the EOS R over the 6D because of better auto-focus, clean HDMI out, and better image quality. For either of these cameras, you’ll also need to get a lens. For more info, here are Tom’s videos about the Canon EOS 6D Mark II and the Canon EOS R.

Canon EF 35mm f/2 Lens
When Tom gave me the Canon EOS 6D Mark II, he also gave me this lens. Admittedly, DSLR cameras and especially lenses are beyond my wheelhouse. I can’t tell you anything about this thing aside from the fact that I absolutely LOVE how it makes my videos & streams look. One thing I do want to note though is that if you want to use this lens with the Canon EOS R, you’ll need to get the EF to RF lens adapter.
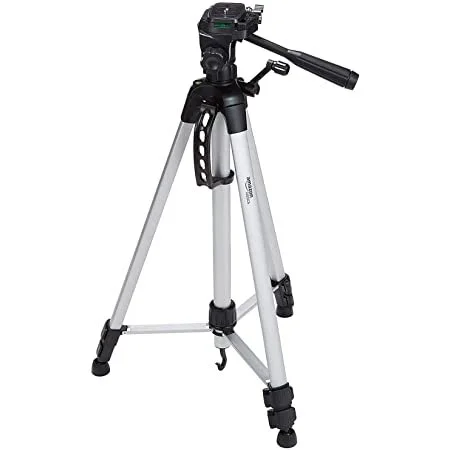
Amazon Basics 60-Inch Tripod
My Canon EOS 6D Mark II and the lens rest on this handy-dandy tripod behind my desk. This tripod is super lightweight so if you plan to use a heavy rig outside, I would suggest getting something sturdier. But I’ve been using this tripod inside my home office for years and it’s great!

Canon AC Adapter & DC Coupler
I use my Canon setup for ALL things video in my studio: pre-recorded video, livestreams, and Zoom meetings. Sometimes, I have this thing on ALL day so there’s no way that batteries would work for me. This adapter/coupler allows me to plug my camera in so I can use my setup for hours on end.

Sony ZV-1
This is my go-to vlogging camera. If I ever have to record footage outside of my studio, I’m using this camera. My Canon rig that I use in my studio is way too heavy for me to vlog with. The Sony ZV-1 is lightweight and the picture/audio quality is stunning. You can also plug in an external microphone. There are plenty of reviews on this camera on Amazon but here’s the first vlog I made with it. Also, just FYI, I’m an auto-everything person - as much as possible, I like to avoid fiddling with camera settings and this camera is awesome just turning it on movie mode and going.

SwitchPod Tripod
When I’m vlogging with my Sony ZV-1, I’m carrying the camera with this. I do use a ball head mount with it but I’m using the one I already had from my Joby Gorillapod. The SwitchPod has ball head mount bundle but I’m not listing it here since I haven’t personally used it. The SwitchPod tripod is probably the lightest tripod ever which is why I LOVE it for vlogging. It’s light AND it’s durable. Also, when you close it up, the angle allows you to put some depth between you and the camera which helps you get a wider angle when you’re filming yourself.

Apple Mac Mini w Apple M1 Chip
Simply put, this the best computer I’ve ever had. Also, I recommend Mac over PC because of my favorite video creation tool, Ecamm Live (see below) which is only available for Macs. Here’s a video that Tom did about the M1 Mac Mini.

Elgato Stream Deck
This is mostly known as a live-streaming tool but I also use it to create my pre-recorded videos. The Stream Deck allows me to easily switch scenes in Ecamm and that basically cut my editing time in half. Here’s a video I did about Ecamm (when I switch scenes in this video, I’m using the Stream Deck).
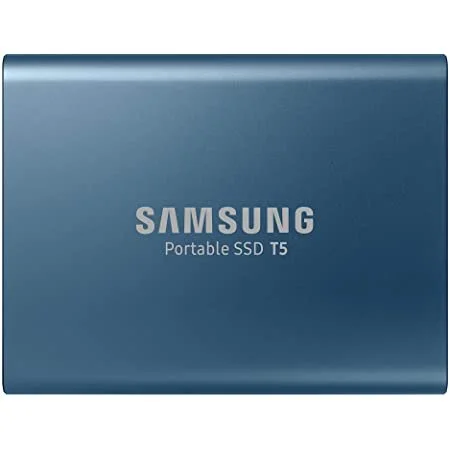
SAMSUNG T5 Portable SSD
Storage is such an important part of my workflow since I keep EVERYTHING: raw footage, final video files, livestreams, podcasts, etc. I wanted a drive that was fast enough for me to edit off of and I also wanted something durable. I have 3 of these now.

Shure MV7
All of my audio is recorded with this mic. I also got my custom colored from colorware.com. Because it’s an XLR mic, you do need an audio interface to go with it. I love this mic so much!

Focusrite Scarlett Solo USB Audio Interface
The Rode PodMic plugs into this audio interface and then I plug this into my M1 Mac Mini. This is my go-to audio setup for livestreams and podcasts. Here’s an in-depth review that Tom did.

Elgato Wave Mic Arm Low Profile
In the past, I’ve used microphones that were mounted on a stand which sat on my desk. But it’s been so nice to use a boom arm since it frees up desk space. I also really like this one since it’s low vs. coming down from overhead, which is what I had before.
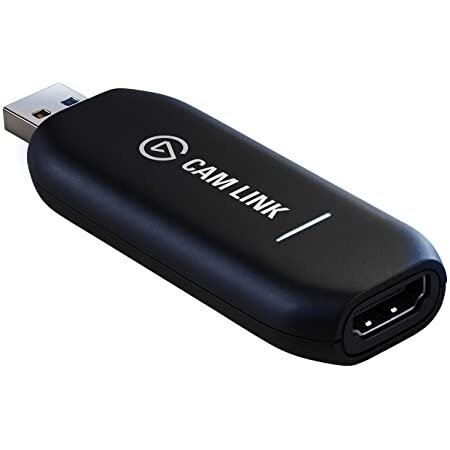
Elgato Cam Link 4K
This little tool is the thing that allows me to use a DSLR camera as a webcam. With this, I’m able to connect my camera to Ecamm and from there, I can record videos, livestream, and have crystal clear meetings on Zoom.

Husky 6 ft. Workbench
In case you’re looking for a desk for your home office, let me suggest this workbench instead! It’s a bit longer than your average desk but I love it!

Nanlite PavoTube 30C 4’ LED Tube Light
This is the light that I have on the floor behind my couch to add more dimension to my purple wall. You can set it to whatever color you want. They’re super versatile!

Falcon Eyes RX-818
This is the main light that lights up the foreground aka me! Being able to adjust the color and the color TEMPERATURE is important. It also comes with a diffuser that you can take on or off.

Philips Hue Bulbs
I have two lamps that use these bulbs throughout my studio. These are great because you can set them to whatever color you want. I even have it programmed to my Stream Deck so I can turn them off/on from my desk! The only problem is that they aren’t very bright but since I use them as accents, it works.

LED Flood Lights
I have two of these on the floor pointing upwards at the walls to brighten things up and make things look more dynamic.
SUBSCRIPTIONS / Software

Tom and I have hosted our Just Create More community for YouTube creators on Mighty Networks for two years. It’s such a versatile tool and I would definitely recommend it to anyone who has an online brand, sells digital products/services, or wants to build an online community!

My entire video setup is built off of my favorite tool which is Ecamm Live. I use Ecamm for anything that has to do with a camera (streaming, pre-recorded videos, tutorials, screen shares, Zoom calls, etc). Ecamm is only available for Macs but because it’s been such a game changer for me, I recommend people consider making the switch from PC to Mac. It’s makes the process of video production not only EASY but FUN. Here’s a video where I talk about how I use Ecamm. Give Ecamm a try with a free trial.

Canva is my go-to tool for all things graphics, overlays, and animations. I use Canva for thumbnails, end cards, banners, lower-thirds, social media content, and other graphics. Graphic design is an essential part of running a YouTube channel and if you don’t want to learn Photoshop, Canva is for you! I have several videos and tutorials about using Canva - check out the playlist here. I used Canva on the free plan for years but now that I’m on the pro plan, I wish I had upgraded sooner!
I caption every single one of my videos, which may sounds like a lot of work, but Descript makes it super easy. It’s been my go-to caption tool for years now. It’s also great to put burned in captions onto short, vertical content!

For years, I used the YouTube audio library for my music needs. It’s not bad but I just out-grew it. Epidemic has 35,000+ tracks and 95,000+ sound effects and the music doesn’t sound like royalty-free music, if you know what I mean. Their search engine is also pretty incredible. I’ve always been able to find exactly what I’m looking for within 5 minutes of searching.

This website that you’re currently viewing was built on Squarespace but for landing pages and sales pages, I like to use Leadpages. Not only is there a lot more customization, it’s just easier to use. One thing to note is that Leadpages is not made to host a full-on website, which is why I’m still using Squarespace. If you’re looking for a tool to create a landing page, here’s a video where I break down the differences between Squarespace and Leadpages.

I have been using Squarespace to build websites for years. This website was build using Squarespace. It’s relatively easy to use and the templates make everything look good. I do think that Leadpages’ web designer is a lot easier to use but if you’re looking to create a traditional website where you need content management (i.e. a blog), I would definitely recommend Squarespace.

I use Buzzsprout to host, publish, and distribute my two podcasts: The Couple’s Table and From 1 to 100. They make it really easy to connect to all the major podcast platforms like iTunes, Spotify, and Google Play. They also have magic mastering to make sure that your audio sounds its best. Sign up with this link and you’ll get a $20 Amazon gift card!